Embed Outlook Shapes within Screenshots
When sending screenshots via email, it may be necessary to highlight something in the image. That's where the insert shapes feature in Microsoft Outlook proves useful. The shapes, however, tend to shift once the email is sent and may not even be pointing to the correct thing anymore. The screenshot could be modified using software like Adobe Photoshop, but there's a quicker way.
Background
For a while, I've just lived with this odd behavior in Microsoft Outlook. The shapes usually only moved 20 or so pixels away from the intended target and the email recipients typically figured out what the screenshot was trying to say. On a few occasions, however, questions were asked.
In some cases, when clarity is crucial, I modified the screenshots in Photoshop and sent the resulting image file. The process is more time intensive, but worth it. However, there's a way to get the accuracy of editing the file in Photoshop and the speed of using shapes in Outlook.
Alternate Solution
To guarantee that Outlook shapes don't move during the transmission process, just follow the steps below. Note: the directions are based on Microsoft Outlook 2010 for Windows 7.
- Start a new message in Microsoft Outlook
- Take a screenshot
- Paste it into the message body
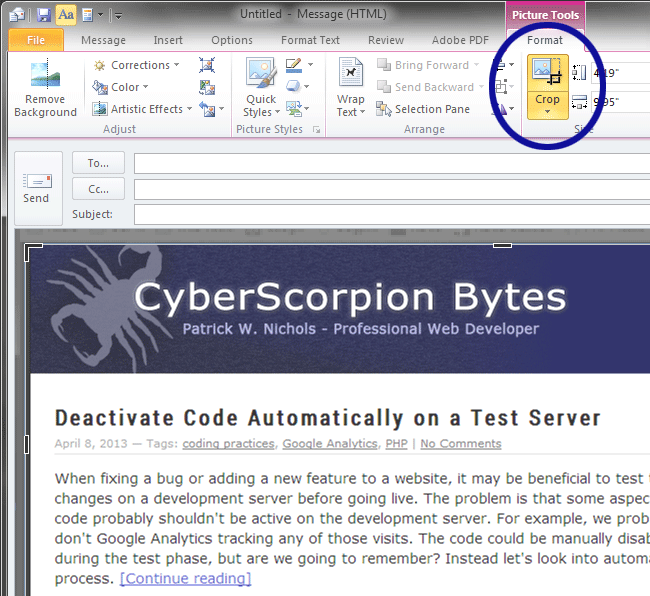
- Crop the screenshot as needed (see Figure 1)
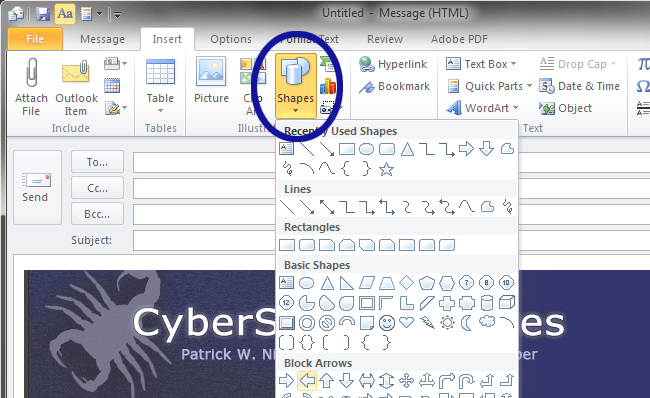
- Add the shape (see Figure 2)
- Position the shape (see Figure 3)
- Take a screenshot of the email message window
- Repeat steps 3 and 4

Figure 1. Cropping the Screenshot

Figure 2. Adding Shapes

Figure 3. Positioning the Shape
Conclusion
Taking a screenshot of the screenshot is a quick and easy way to embed a shape within a graphic. There's no need to leave Microsoft Outlook. Plus, the screenshot can be pasted into the message body instead of included as an attachment.


1 Comment
so clever!! Have been looking for a solution to this for years!
Leave a Comment