Manage Tasks in Outlook: Create Customizable Tasks
Sometimes I just need more control over the tasks created in Microsoft Outlook. Being able to flag emails that I may need to follow up with is great, but the options for customizing the resulting tasks can be too limiting. For the times where you need more control, Outlook provides additional ways to create tasks.
Background
In the previous post (Manage Tasks in Outlook: Flagging Emails as Tasks), we flagged an email so it appears in the task list. We also saw how to change the resulting task's title to better fit your needs.
The problem is that there isn't much else that you can edit about the task. If an email has several sub-tasks, it might be useful to modify how they are listed so none get missed. Or you may want to incorporate additional detail to the task. Someone, for example, may stop by after sending the message with a few extra bits that were not mentioned in the email.
For these more complicated situations, you can use one of Outlook's alternative ways to add tasks.
Note: the following directions are based Microsoft Outlook 2010 for Windows 7.
Create New Task
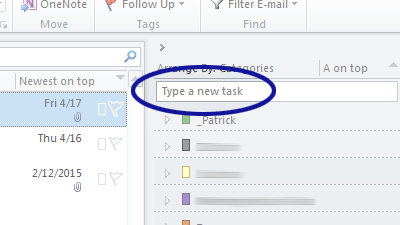
The most obvious way to create a customizable task is to use the text area in the Task List column (see Figure 1).

Figure 1. New Task Field
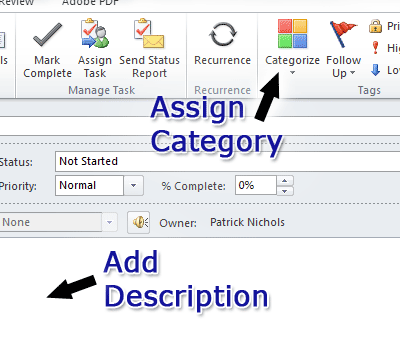
You just type the task title and press enter on the keyboard. You can then double click the newly added task to fill in the task description, select the category, etc. (see Figure 2).

Figure 2. Customize the Task Details
Drag Email
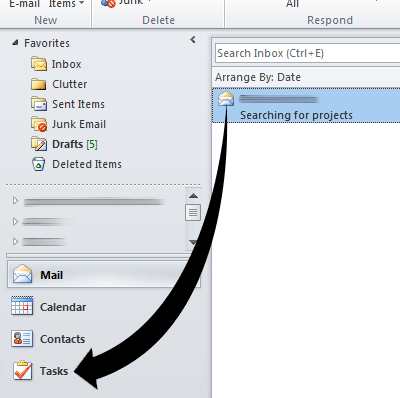
Another, potentially quicker, way to create a task is drag an email and drop it on the Tasks tab (see Figure 3).

Figure 3. Drag Email to Tasks Tab
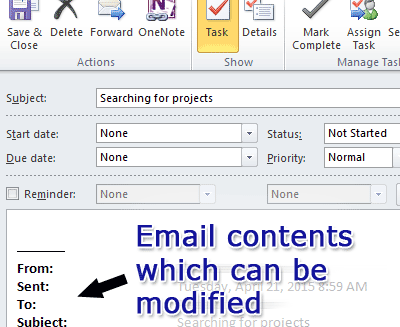
The drag and drop method automatically names the task based on the email's subject. It also takes the message from the email and inserts it into the body of the task (see Figure 4).

Figure 4. Email Message Automatically Included
Final Thoughts
In addition to both of these methods allowing you to customize the tasks as needed, it's also beneficial if you use multiple Outlook Data Files. For example, I have several Outlook Data Files; one for each website I maintain. That way I can organize my email based on the website it is for.
When an email arrives in my inbox, I might flag it using a method from the previous post (Manage Tasks in Outlook: Flagging Emails as Tasks). Everything works fine until I move the flagged email from the inbox to a folder in a separate Outlook Data File. Moving the email ends up removing the corresponding task.
The methods described in this post don't have that problem since the task isn't tied directly to an email.
Related Posts
- Store Task Emails in Microsoft Outlook Data Files
- Streamline Process for Flagging Emails as Tasks in Microsoft Outlook
- Manage Tasks in Outlook: Flag Emails as Tasks Before They Get Lost in the Sent Mail Folder
- Manage Tasks in Outlook: Leveraging Task Descriptions
- Manage Tasks in Outlook: Flagging Emails as Tasks
- Manage Tasks in Outlook: Categorizing Tasks


0 Comments
There are currently no comments.
Leave a Comment